Headless Server with VNC Remote Control

Headless Server with VNC Remote Control
圣诞节快乐🎉, 当然要同时布置一些好玩的内容来提升孩子们的水平, 现在我就来记录整个完成的过程与解答吧
实验内容
购买一个服务器并且安装桌面(gnome,plasma,mate,xfce),使用vncserver(推荐tigervnc)运行在服务器上,分别使用novnc(运行在服务器上)和VNC viewer(推荐real vnc viewer或者Remmina)链接到服务器的远程桌面.
准备
vnc是什么
VNC(Virtual Network Computing)是一种图形桌面共享系统,它使用远程帧缓冲协议(RFB)来控制另一台计算机的屏幕。通过VNC,用户可以远程查看和操作另一台计算机的桌面界面,就好像坐在前面一样,这使得它成为远程工作、技术支持和教育等多种场合的理想工具。
vnc有什么用
如上所说, vnc配合桌面图形软件将整个只能无聊输入命令行的服务器, 变成了一台真正的云个人电脑 (没声音的)
noVNC是什么, 为什么需要它
noVNC是一个开源项目,提供了一种通过Web浏览器访问远程桌面的方式。它实现了VNC(Virtual Network Computing)客户端,使用HTML5的WebSockets和Canvas技术。简而言之,noVNC允许用户不需要安装任何额外软件,只需通过现代Web浏览器即可连接和控制远程计算机. 而且配合最基础的普通代理, 由于协议从vnc被转换成了wss, 访问云电脑的速度也能飞一般的提升, 而不是卡卡的感觉了.
前期配置
一台云服务器, 这里使用 debian
➜  ~ neofetch
       _,met$$$$$gg.          [email protected]
    ,g$$$$$$$$$$$$$$$P.       ----------------------------------
  ,g$$P"     """Y$$.".        OS: Debian GNU/Linux 12 (bookworm) x86_64
 ,$$P'              `$$$.     Host: OpenStack Nova 23.0.2
',$$P       ,ggs.     `$$b:   Kernel: 6.1.0-10-amd64
`d$$'     ,$P"'   .    $$$    Uptime: 44 days, 6 hours, 10 mins
 $$P      d$'     ,    $$P    Packages: 934 (dpkg)
 $$:      $$.   -    ,d$$'    Shell: zsh 5.9
 $$;      Y$b._   _,d$P'      Resolution: 1024x768
 Y$$.    `.`"Y$$$$P"'         Terminal: /dev/pts/0
 `$$b      "-.__              CPU: Intel Xeon E5-2696 v4 (1) @ 2.199GHz
  `Y$$                        GPU: 00:02.0 Cirrus Logic GD 5446
   `Y$$.                      Memory: 247MiB / 1967MiB
     `$$b.
       `Y$$b.
          `"Y$b._
              `"""
操作记录
安装桌面系统
以 xfce 为例子, 先安装桌面系统 (嗨呀, 都看到这里了, 记得收藏真红姐姐的站点)
sudo apt update && sudo apt -y upgrade
sudo apt install -y tasksel

# 如果您是ubuntu系统, 可以直接 (诶, 我不是在用debian吗)
sudo tasksel install xubuntu-desktop

# 如果是其他系统(包括ubuntu)
sudo tasksel
# 然后选中 xfce, 按下 enter

sudo apt install gtk2-engines
记录vnc的安装
无用的内容
下面是一些无用的内容, 感兴趣的同学也可以猜猜是做了啥
export LIBGL_ALWAYS_INDIRECT=1
sudo /etc/init.d/dbus start &> /dev/null
把这段话写进 ~/.bashrc 或者 ~/.zshrc 里面.
You can also create a file called /etc/sudoers.d/dbus and add the following in it using your username
your_user_name ALL = (root) NOPASSWD: /etc/init.d/dbusThis does come with risks but it should be ok for most.
install vncserver
apt install tigervnc-standalone-server tigervnc-xorg-extension tigervnc-scraping-server这是 vncserver 的 help (摆在这里假装博客内容很多):
➜  ~ vncserver --help
vncserver usage:

  Help can be found in vncserver(1), or via usage of
     -help                   if specified, dumps this help message.
     -h                      is an alias for help.
     -?                      is an alias for help.

  To start a VNC server use vncserver [options] [-- session]
    [:<number>]              specifies the X11 display to be used.
    [-display <value>]       is an alias for :<number>.
    [-fg]                    if enabled, vncserver will stay in the foreground.
    [-useold]                if given, start a VNC server only if one is not already running.
    [-verbose]               if specified, debugging output is enabled.
    [-dry-run]               if enabled, no real action is taken only a simulation of what would be done is performed.
    [-PAMService <value>]    specifies the service name for PAM password validation that is used in case of security types Plain, TLSPlain, or X509Plain. On
                             default, vnc is used if present otherwise tigervnc is used.
    [-pam_service <value>]   is an alias for PAMService.
    [-PlainUsers <value>]    specifies the list of authorized users for the security types Plain, TLSPlain, and X509Plain.
    [-localhost [yes|no]]    if enabled, VNC will only accept connections from localhost.
    [-desktop <value>]       specifies the VNC desktop name.
    [-rfbport <number>]      provides the TCP port to be used for the RFB protocol.
    [-rfbunixpath <value>]   specifies the path of the Unix domain socket to be used for the RFB protocol.
    [-rfbunixmode <value>]   specifies the mode of the Unix domain socket, default is 0600.
    [-X509Key <value>]       denotes a X509 certificate key file (PEM format). This is used by the security types X509None, X509Vnc, and X509Plain.
    [-X509Cert <value>]      denotes the corresponding X509 certificate (PEM format).
    [-PasswordFile <value>]  specifies the password file for security types VncAuth, TLSVnc, and X509Vnc. On default, ~/.vnc/passwd is used.
    [-rfbauth <value>]       is an alias for PasswordFile.
    [-SecurityTypes <value>] specifies a comma list of security types to offer (None, VncAuth, Plain, TLSNone, TLSVnc, TLSPlain, X509None, X509Vnc,
                             X509Plain). On default, offer only VncAuth.
    [-geometry <value>]      specifies the desktop geometry, e.g., <width>x<height>.
    [-wmDecoration <value>]  if specified, shrinks the geometry by the given <width>x<height> value.
    [-xdisplaydefaults]      if given, obtain the geometry and pixelformat from a running X server.
    [-xstartup [<value>]]    specifies the script to start an X11 session for Xtigervnc.
    [-noxstartup]            disables X session startup.
    [-depth <number>]        specifies the bit depth of the desktop, e.g., 16, 24, or 32.
    [-pixelformat <value>]   defines the X11 server pixel format. Valid values are rgb888, rgb565, bgr888, or bgr565.
    [-autokill [yes|no]]     if enabled -- the default -- the VNC server is killed after its X session has terminated.
    [-fp <value>]            specifies a colon separated list of font locations.
    [Xtigervnc options...]   For details, see Xtigervnc(1).
    [-- <session>]           specifies the X11 session to start with either a command or a session name.

  To list all active VNC servers of the user use vncserver
     -list                   if provided, all active VNC servers of the user are listed.
    [:<number>]              specifies the X11 display to be used.
    [-display <value>]       is an alias for :<number>.
    [-rfbport <number>]      provides the TCP port to be used for the RFB protocol.
    [-rfbunixpath <value>]   specifies the path of the Unix domain socket to be used for the RFB protocol.
    [-cleanstale]            if provided, clean up pid and lockfiles of stale VNC server instances of the user.

  To kill a VNC server use vncserver
     -kill                   if provided, kill the specified VNC server of the user.
    [:<number>]              specifies the X11 display to be used.
    [-display <value>]       is an alias for :<number>.
    [-rfbport <number>]      provides the TCP port to be used for the RFB protocol.
    [-rfbunixpath <value>]   specifies the path of the Unix domain socket to be used for the RFB protocol.
    [-dry-run]               if enabled, no real action is taken only a simulation of what would be done is performed.
    [-verbose]               if specified, debugging output is enabled.
    [-clean]                 if specified, the log files of the terminated VNC session will also be removed.

  To dump version information use vncserver
    [-version]               dumps version information of underlying Xtigervnc VNC server.
接下来, 输入
➜  ~ vncserver -localhost no

You will require a password to access your desktops.

Password:
Verify:
Would you like to enter a view-only password (y/n)? n
A view-only password is not used
/usr/bin/xauth:  file /root/.Xauthority does not exist

New Xtigervnc server 'lab.nkd.red:1 (root)' on port 5901 for display :1.
Use xtigervncviewer -SecurityTypes VncAuth,TLSVnc -passwd /tmp/tigervnc.TJqJuC/passwd lab.nkd.red:1 to connect to the VNC server.
然后就是展示成果的时候:
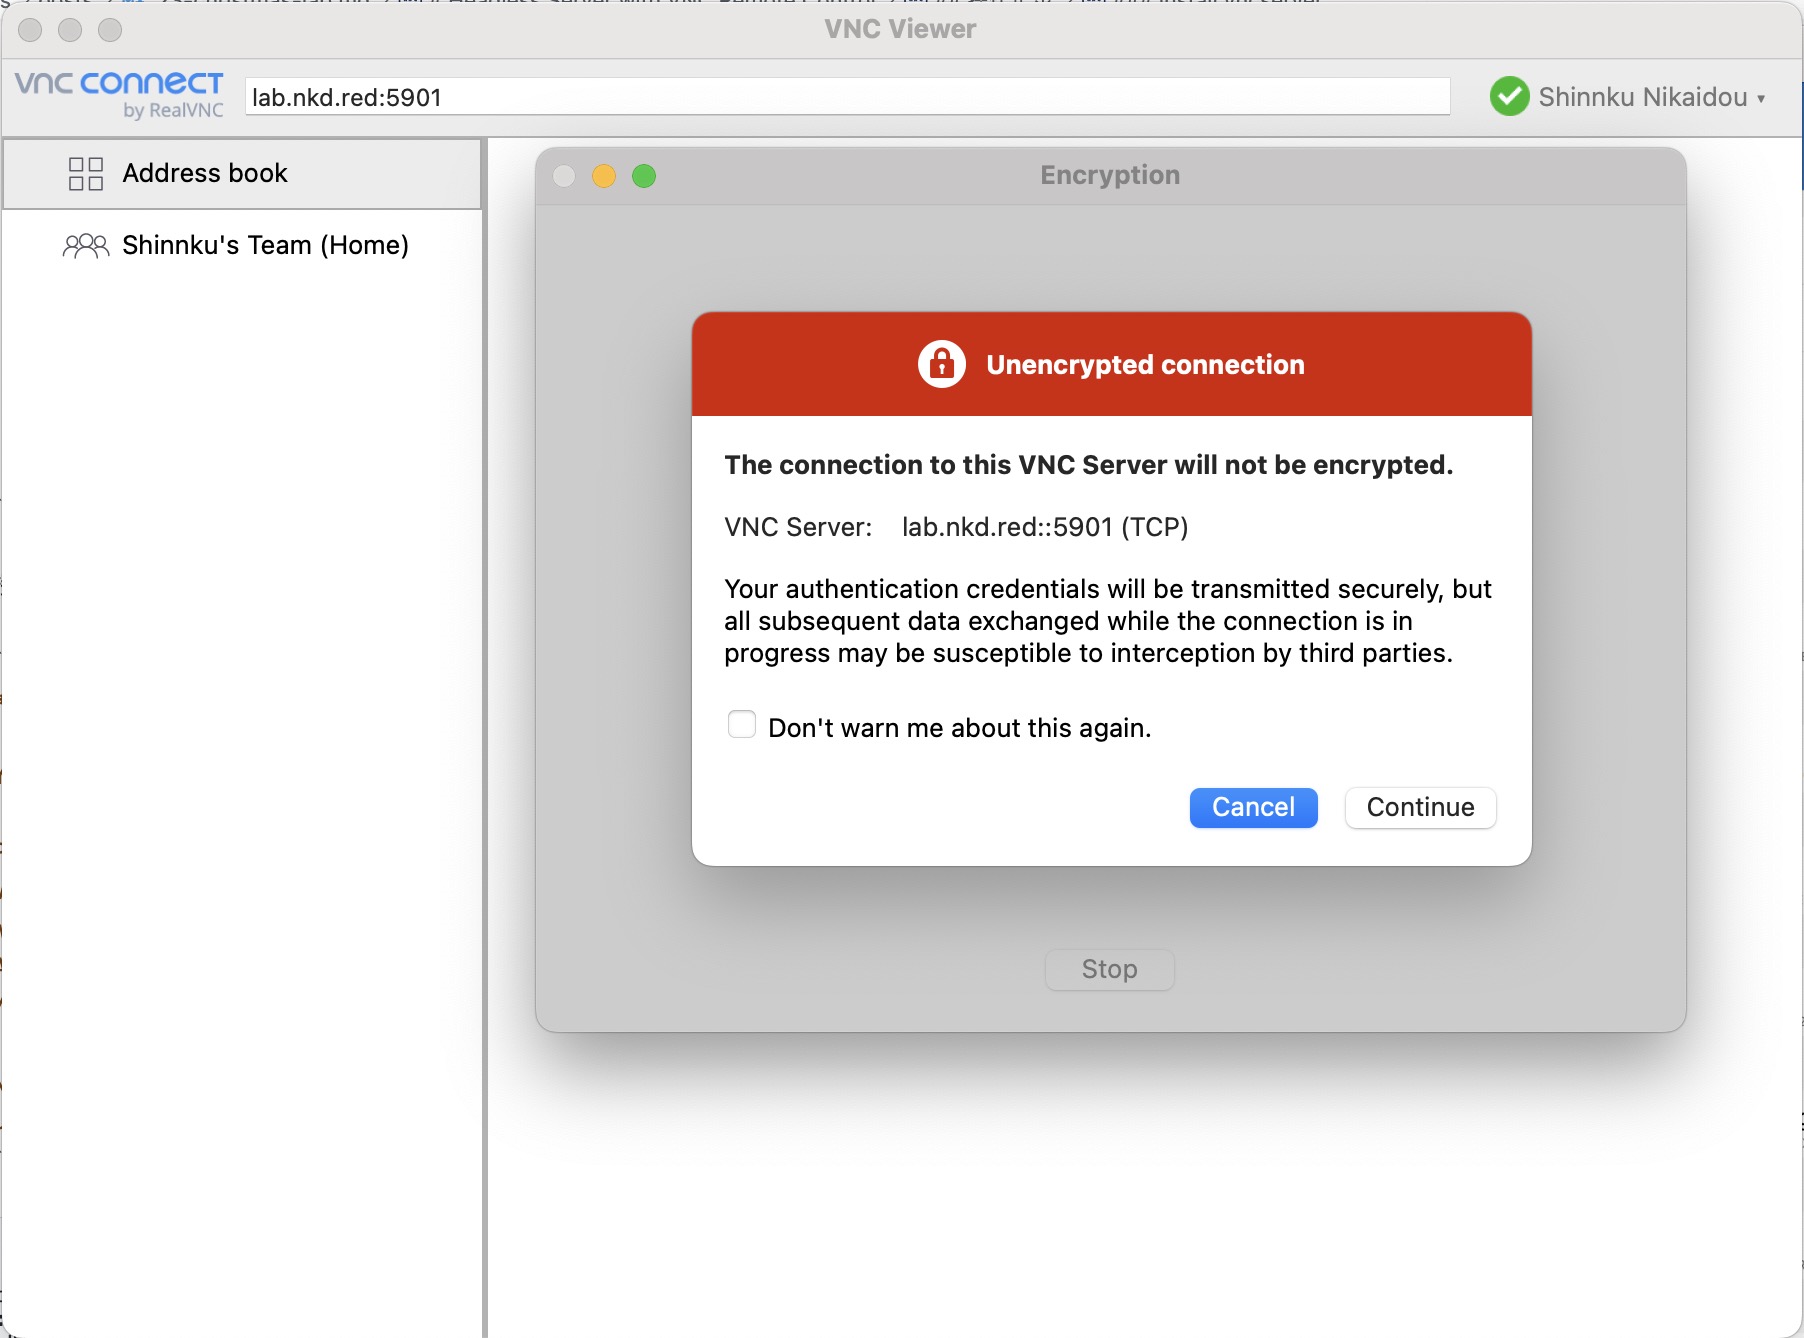
macos的 vnc viewer 软件界面
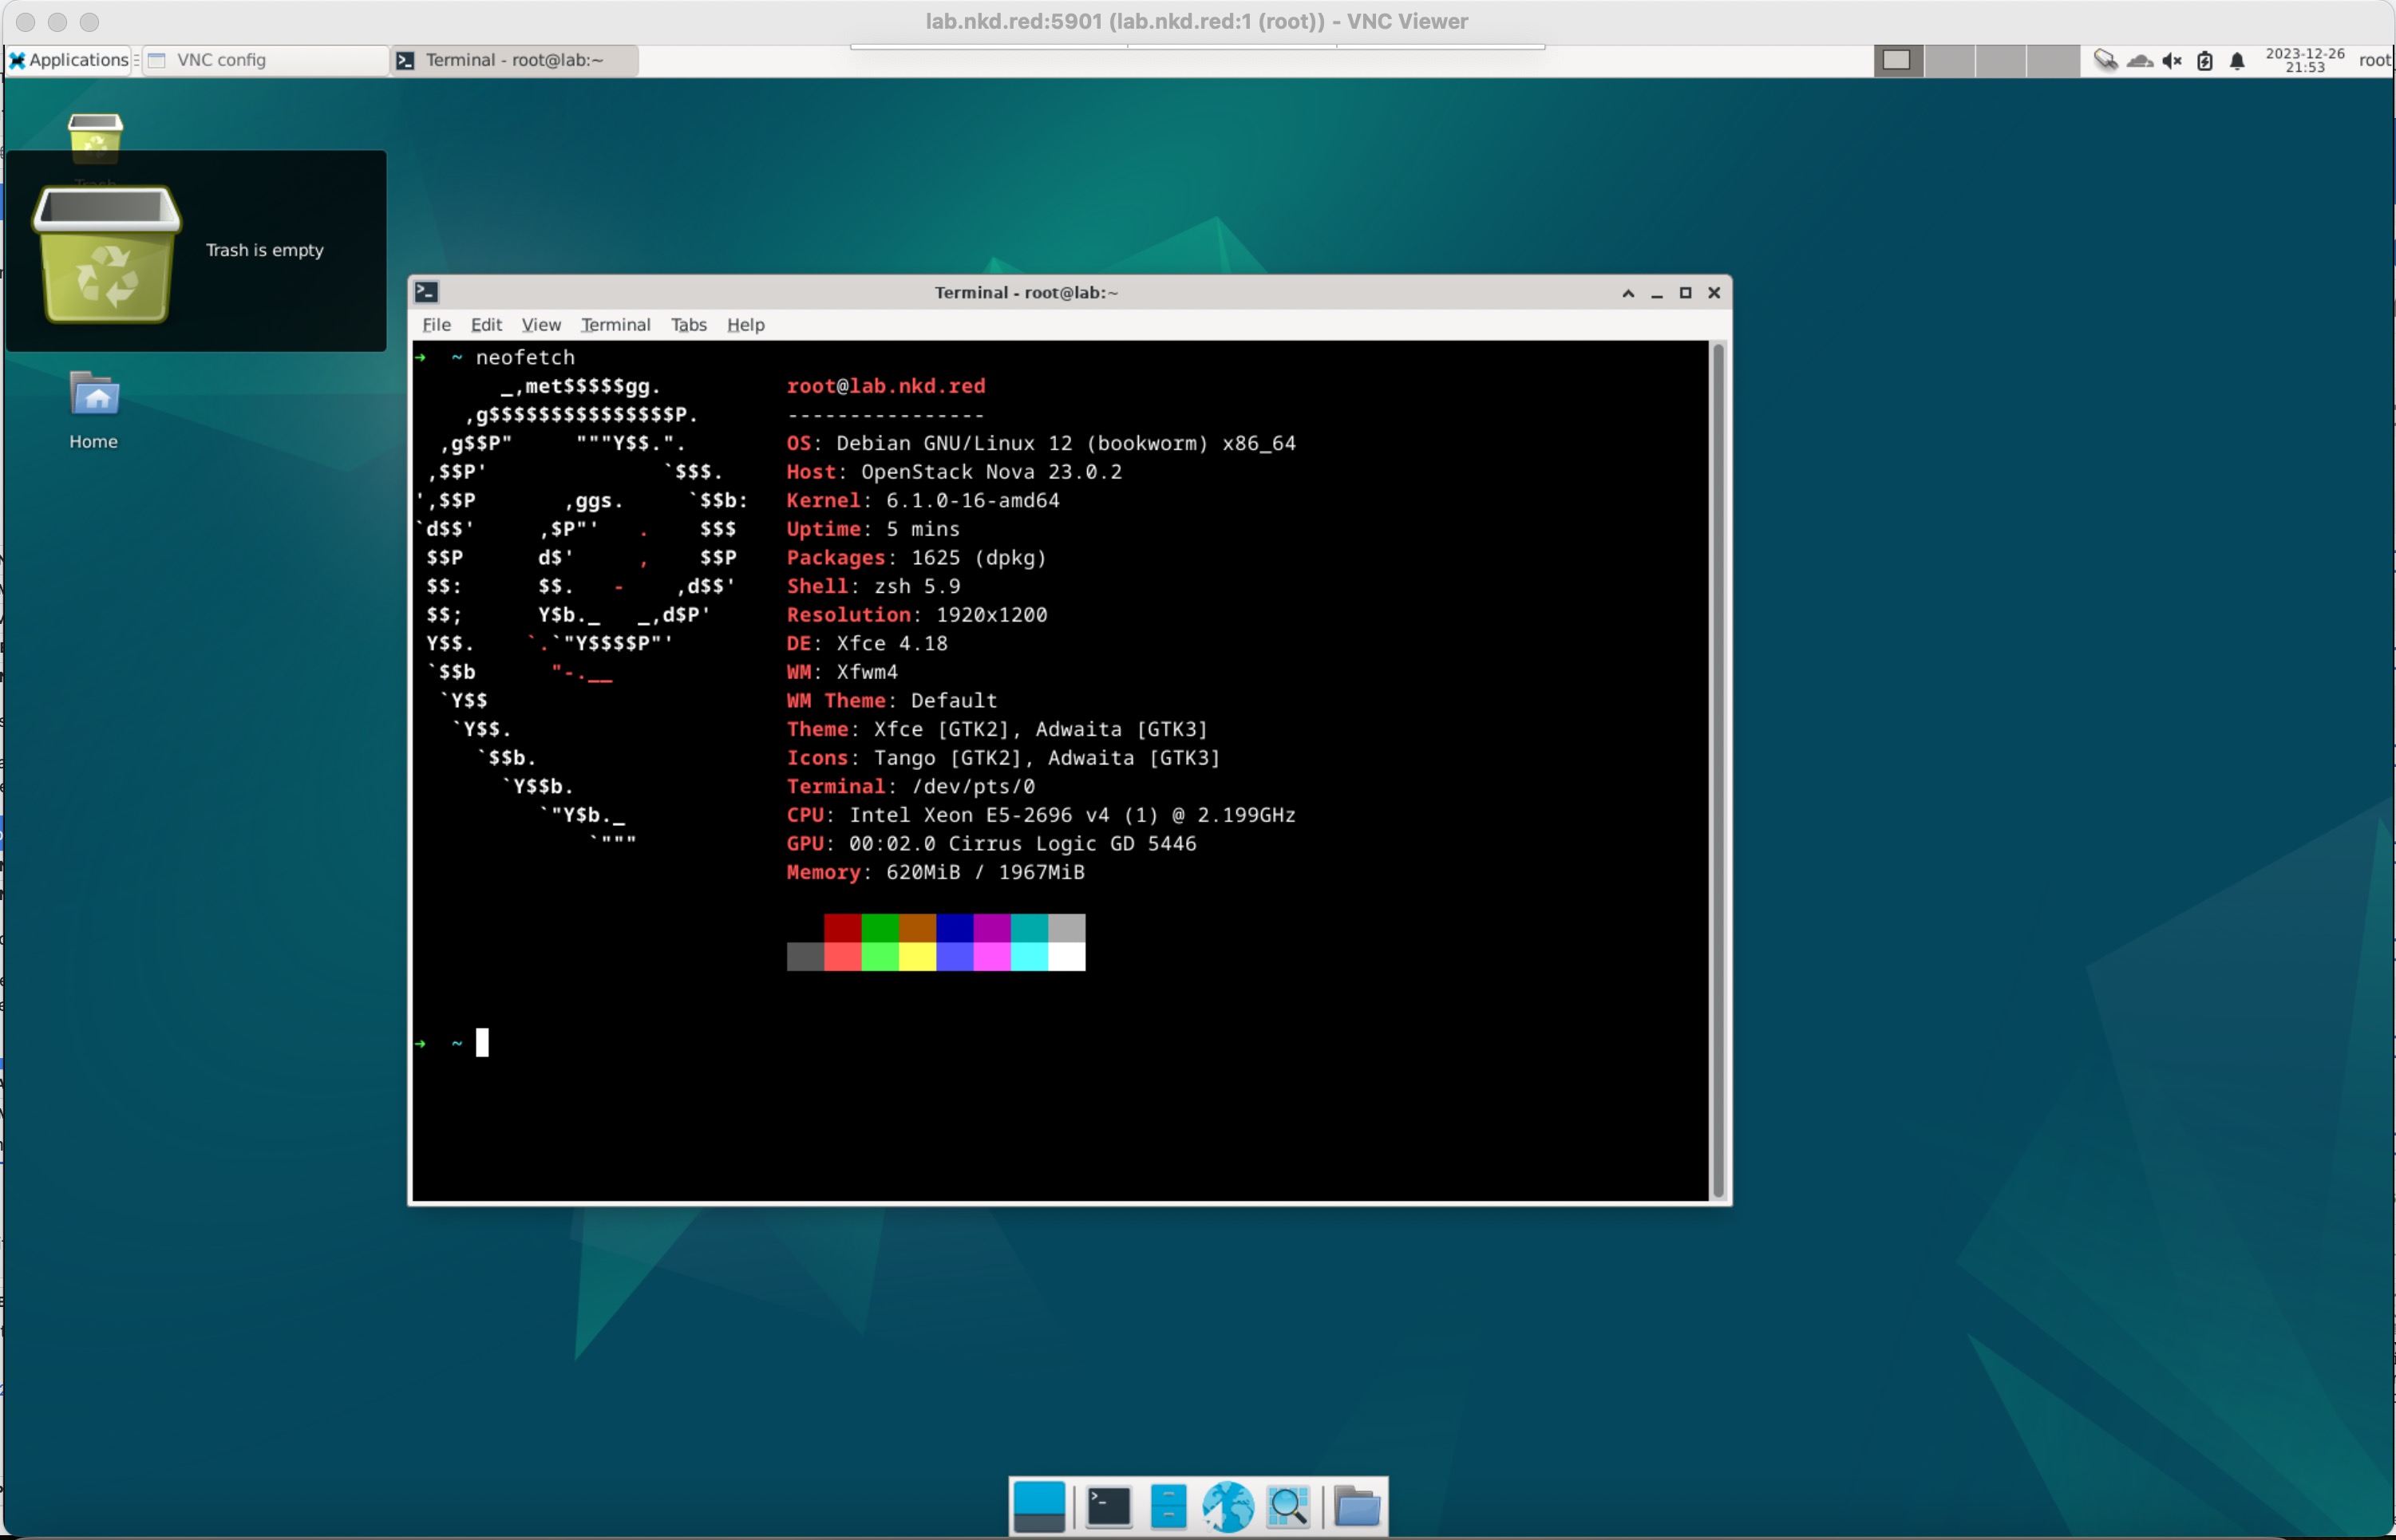
与服务器的 vnc server 连接成功
安装 novnc
https://github.com/novnc/noVNC
先clone git clone https://github.com/novnc/noVNC.git .
进入目录 cd noVNC
安装nodejs以及pnpm
curl -sL https://deb.nodesource.com/setup_20.x | sudo -E bash -
sudo apt install nodejs -y
curl -fsSL https://get.pnpm.io/install.sh | sh -
source /root/.zshrc # source /root/.bashrc
编译noVNC
呵呵, 虽然上面安装了 pnpm , 但是我们还是使用 npm, 不要问我为什么
npm i
npm run lint
npm run prepublish

# 安装 numpy 加速 novnc
apt install python3-numpy
运行
假设你的 vncserver 运行在 5901 上面.
➜  noVNC git:(master) ✗ ./utils/novnc_proxy --vnc localhost:5901 --listen 0.0.0.0:8080
Warning: could not find self.pem
Starting webserver and WebSockets proxy on host 0.0.0.0 port 8080
WebSocket server settings:
  - Listen on 0.0.0.0:8080
  - Web server. Web root: /root/codes/noVNC
  - No SSL/TLS support (no cert file)
  - proxying from 0.0.0.0:8080 to localhost:5901

Navigate to this URL:
    http://0.0.0.0:8080/vnc.html?host=0.0.0.0&port=8080

Press Ctrl-C to exit
我的url就稍微改写成 http://lab.nkd.red:8080/vnc.html?host=lab.nkd.red&port=8080 , 浏览器输入进入
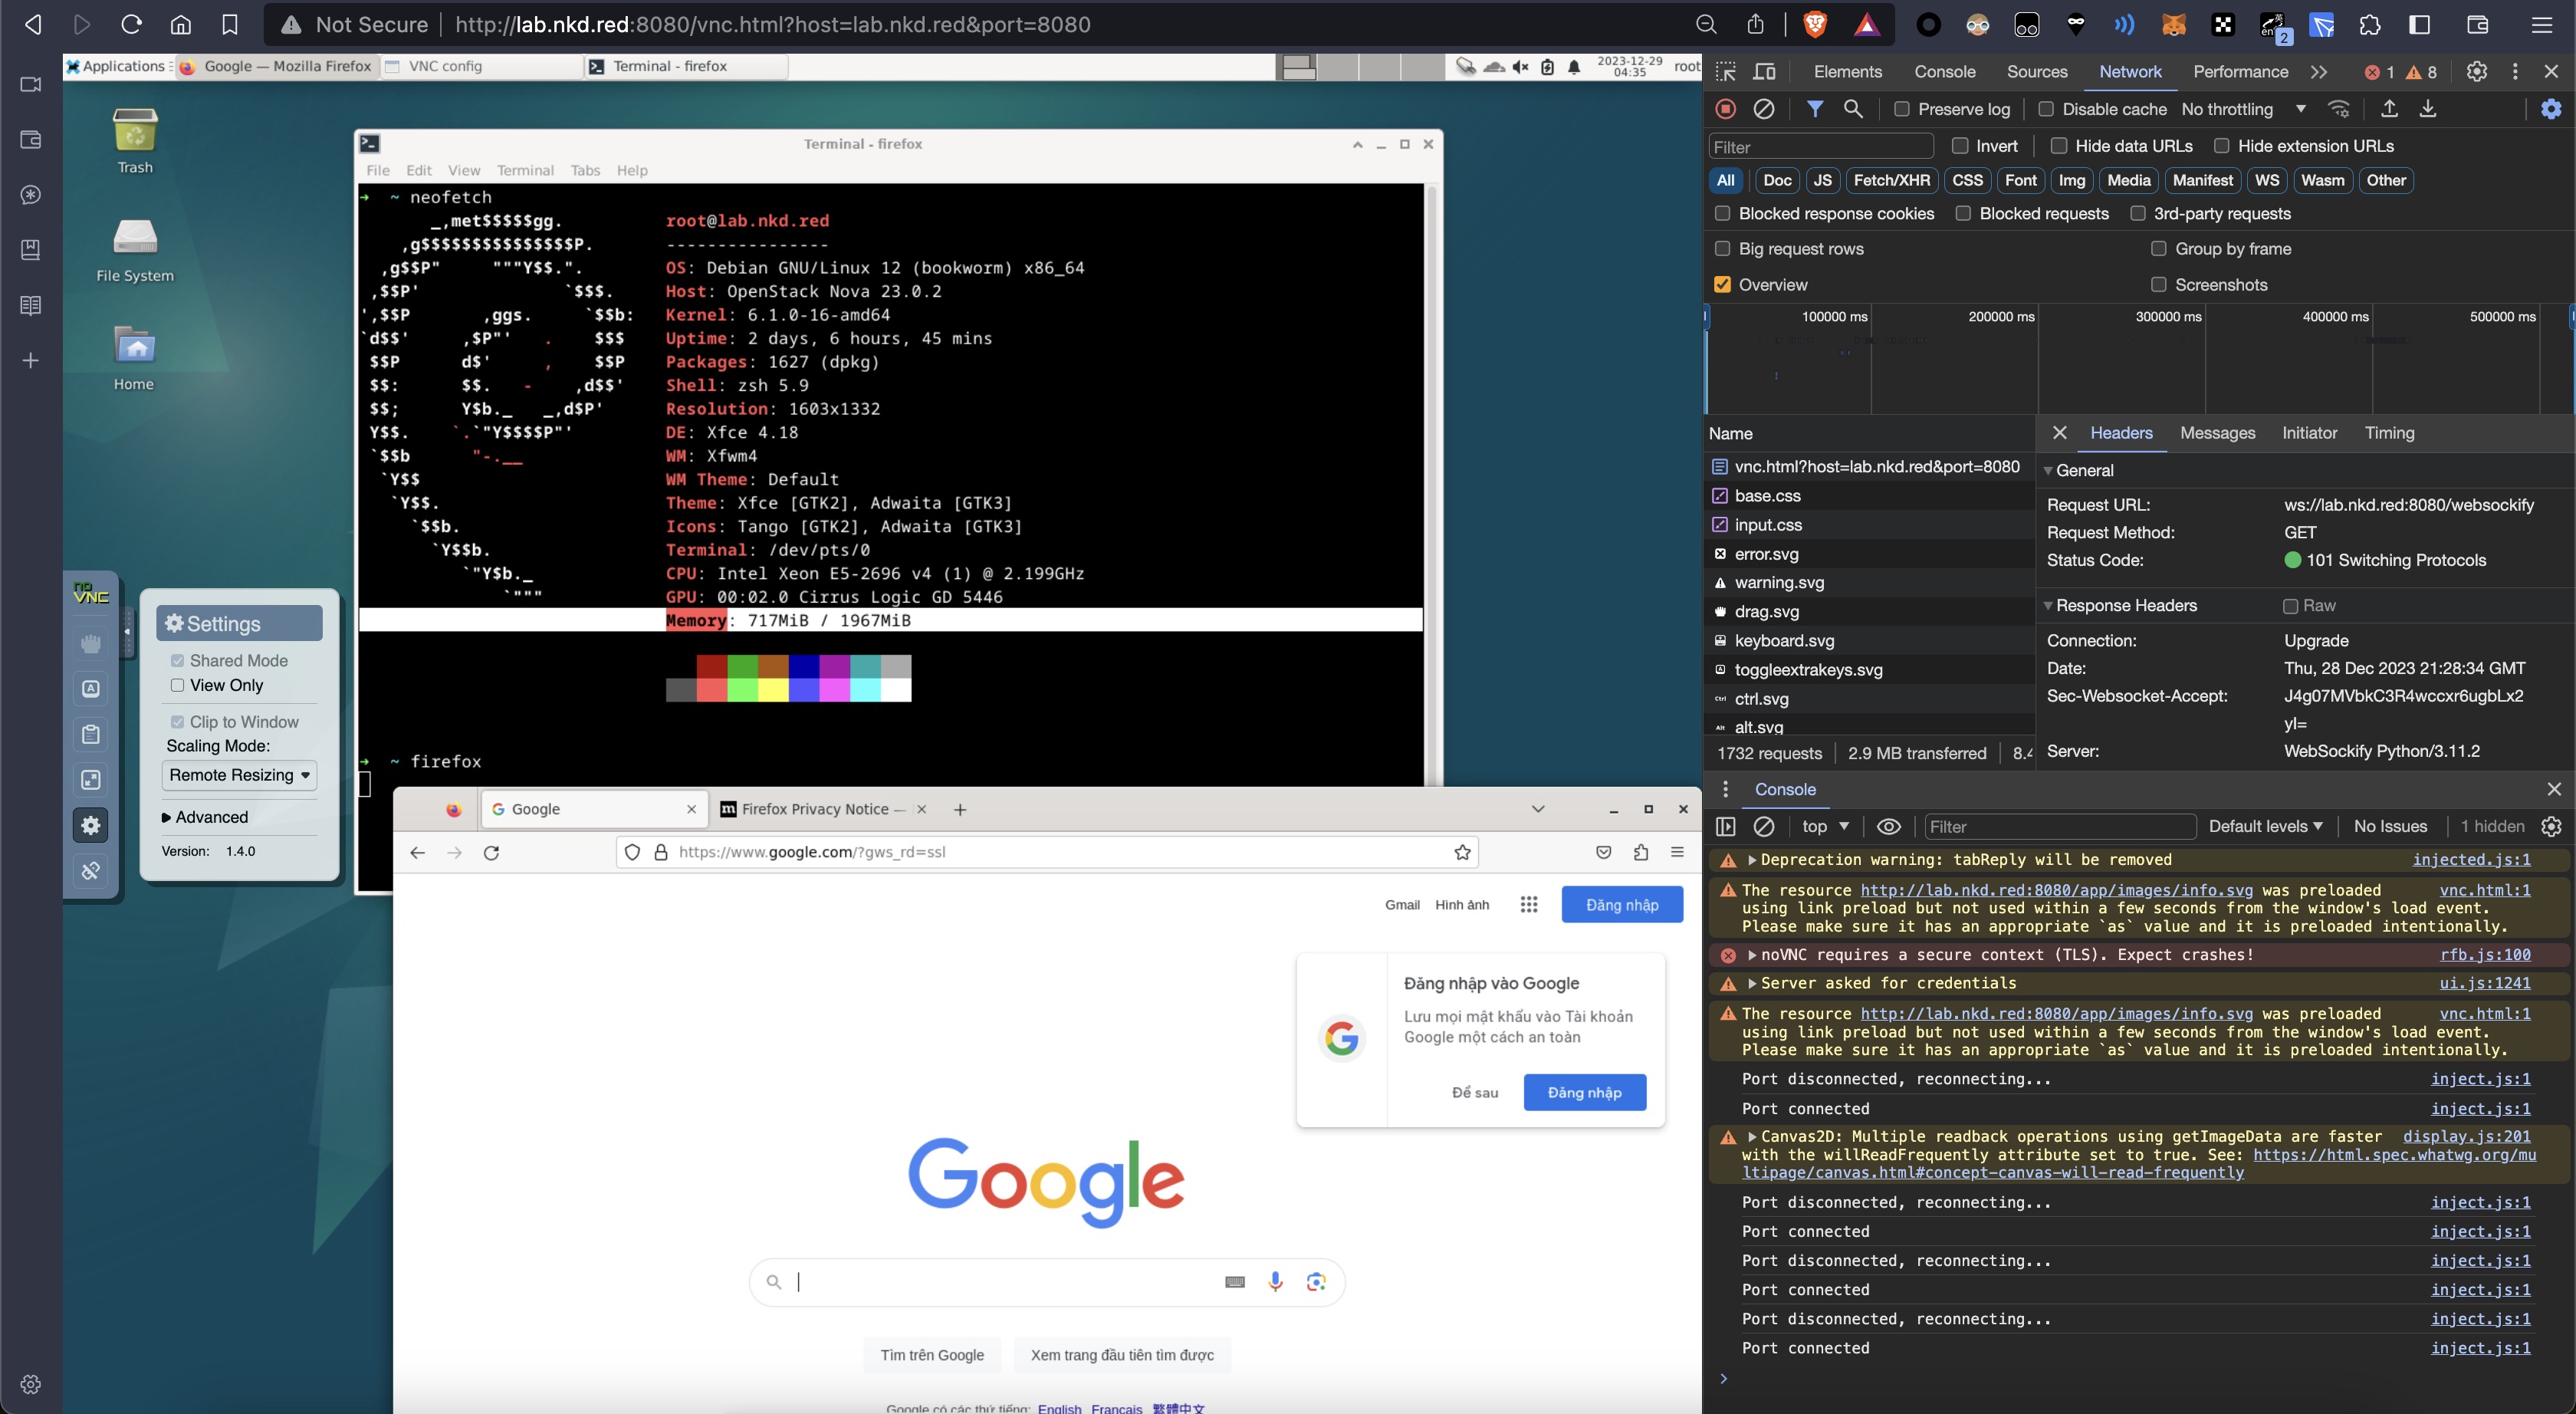
网页当中成功打开, 并且很流畅再也不卡卡.
记得左边的setting里面改成 remote resizing, 还有学会使用 clipboard, 很有帮助.
好玩的
看图即秒懂
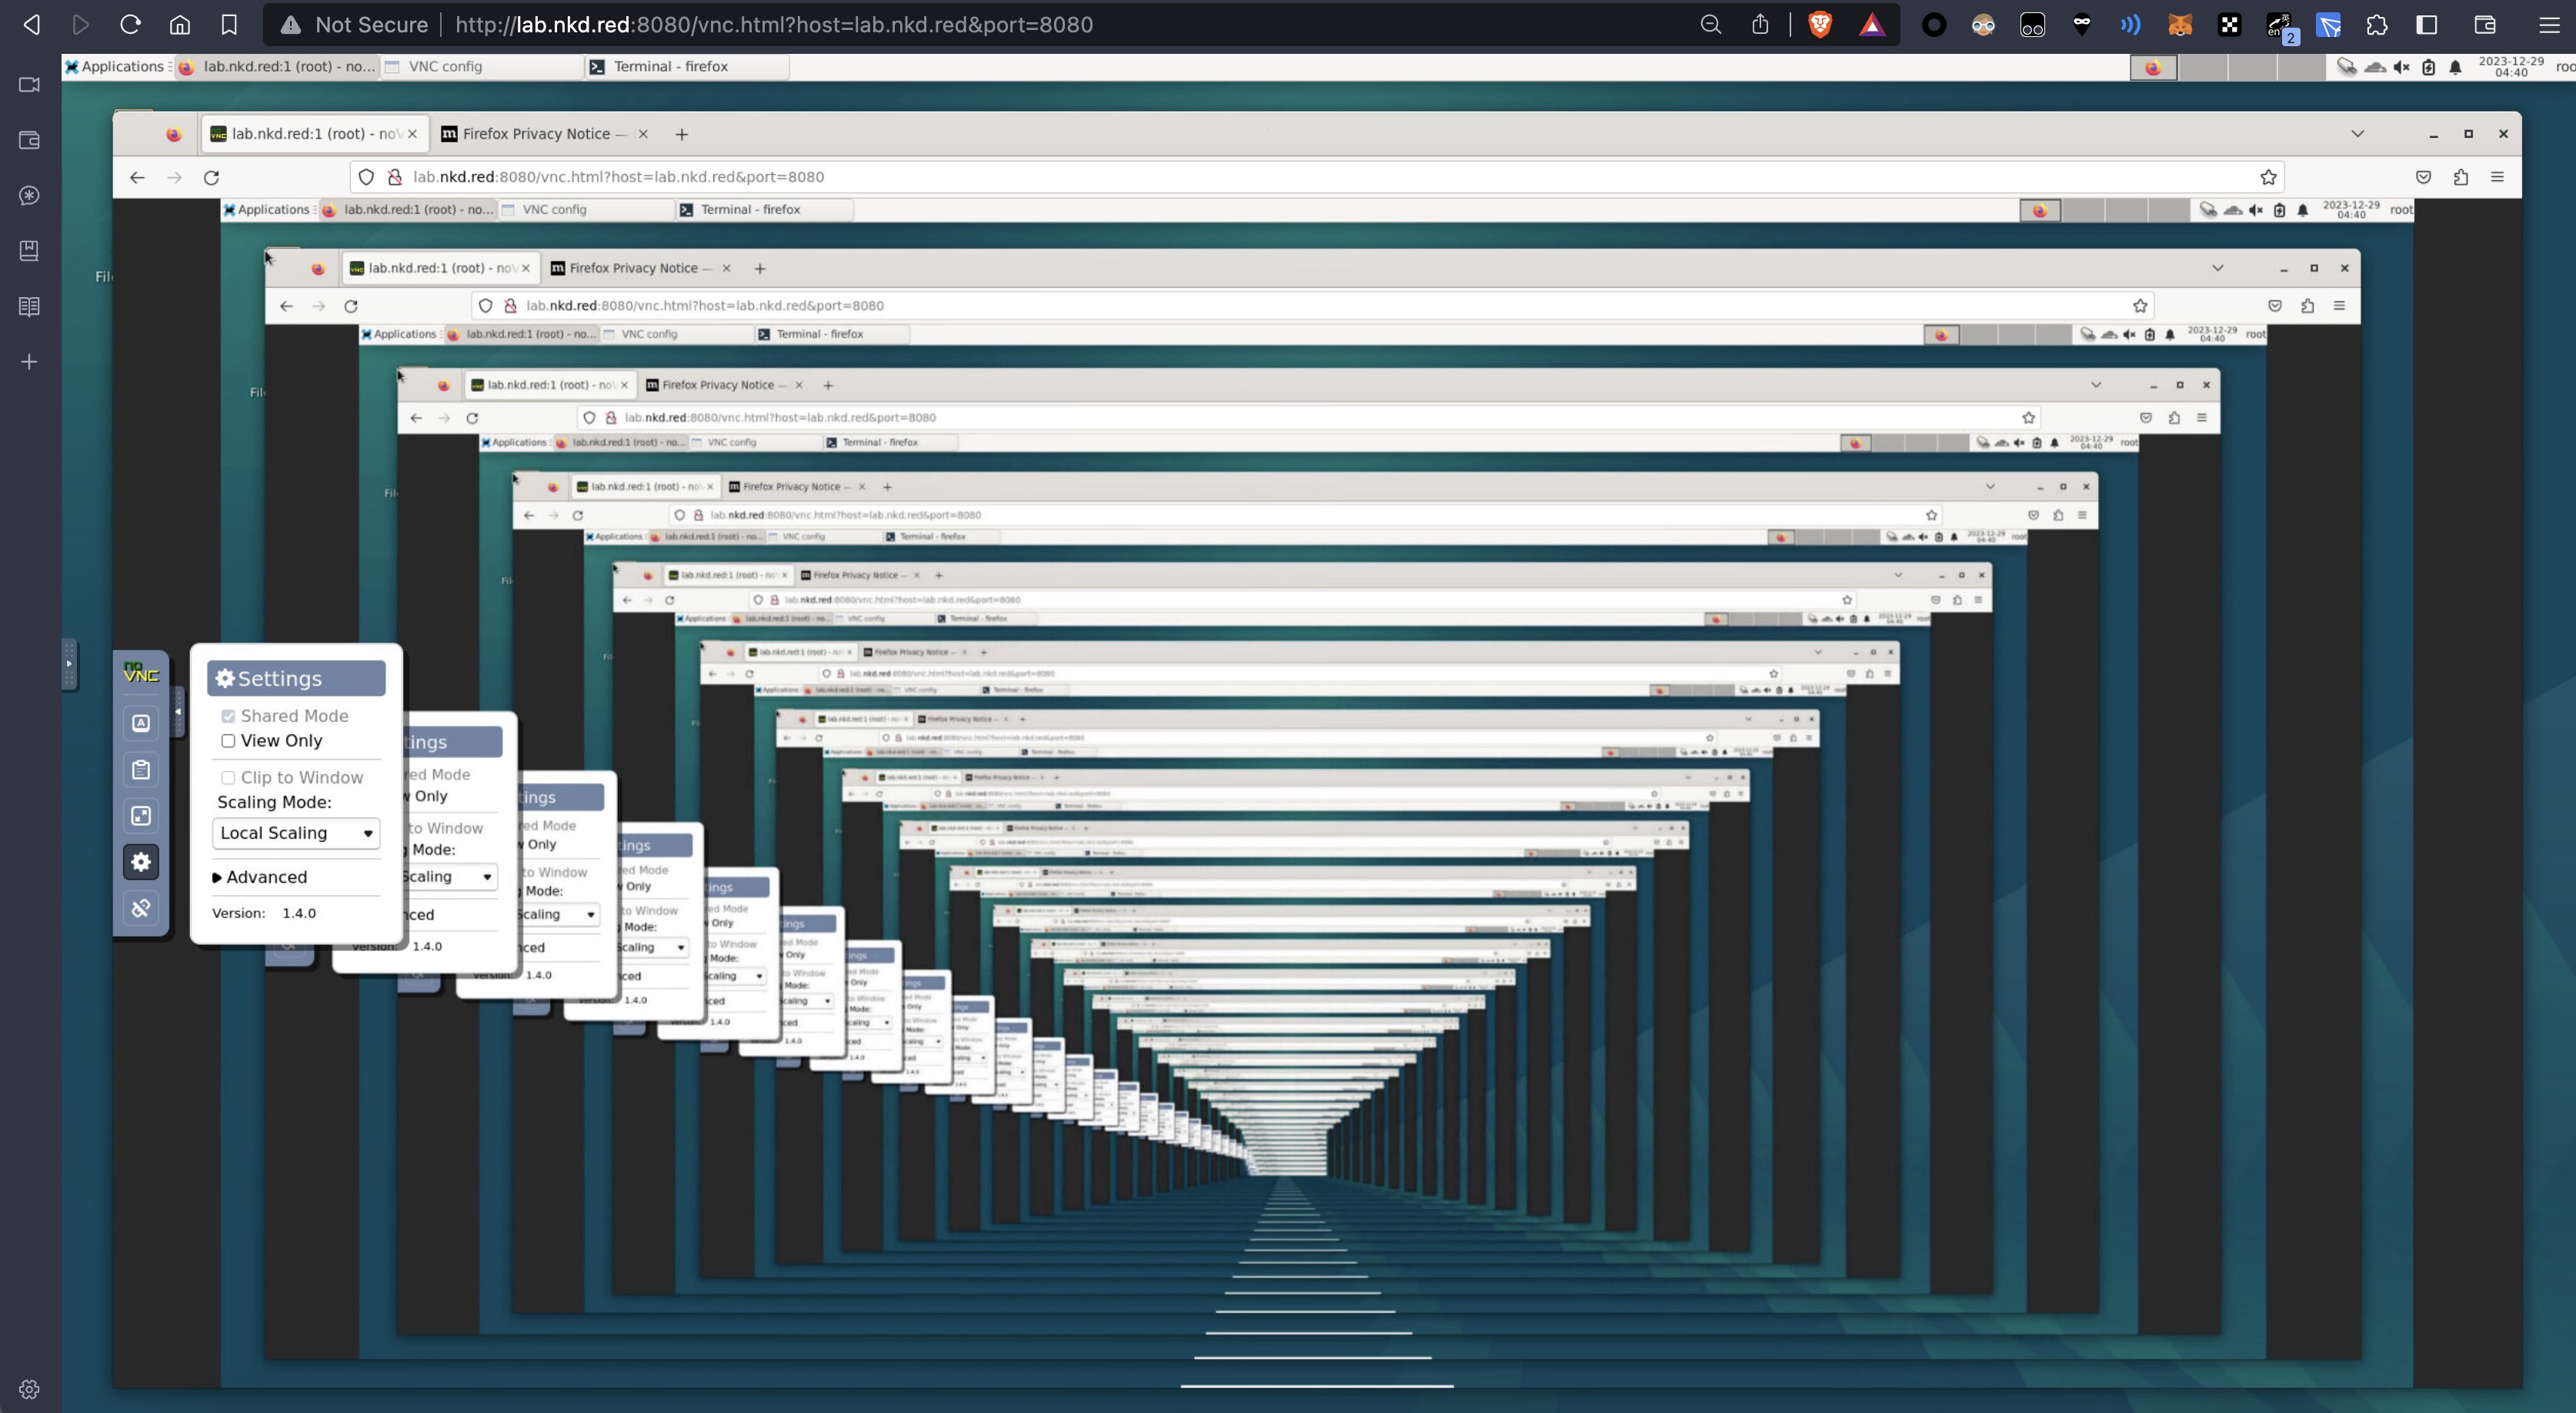 无限巡回长廊.
给 noVNC 配置 ssl (选做)
install certbot
sudo snap install core; sudo snap refresh core
sudo snap install --classic certbot
sudo ln -s /snap/bin/certbot /usr/bin/certbot
snap set certbot trust-plugin-with-root=ok
sudo snap install certbot-dns-cloudflare

mkdir -p .secrets/certbot

vim .secrets/certbot/cloudflare.ini
内容具体应该如下, 请在你的cloudflare账户里面找到My Profile -> API Tokens -> 编辑区域DNS api, 然后填进去
# Cloudflare API token used by Certbot
dns_cloudflare_api_token = xxxXXxxxxxXxxxxxxXxx-w-xxxx-XxxxxX
chmod 600 ~/.secrets/certbot/*接下来就是给域名签名, 我的域名是 lab.nkd.red
泛域名解析的签名
下面用 nkd.red, *.nkd.red 域名作为示范.
一句命令就签名了, 啥都不需要
certbot certonly --dns-cloudflare --dns-cloudflare-credentials ~/.secrets/certbot/cloudflare.ini --dns-cloudflare-propagation-seconds 30 -d \*.nkd.red -d nkd.red这条命令是使用Certbot(一个免费的证书管理工具,用于自动化Let’s Encrypt SSL证书的获取和续期)来获取SSL/TLS证书,特别是为了使用Cloudflare的DNS记录进行域名验证。下面是命令的逐部分解释:
certbot certonly: 这是Certbot的一个子命令,用于获取或更新证书,但不会自动配置Web服务器(即只获取证书)。--dns-cloudflare: 这指定了Certbot应该使用DNS方式验证域名所有权,并且使用的是Cloudflare的DNS API。这意味着Certbot将通过Cloudflare的API自动添加DNS记录来证明你控制了域名。--dns-cloudflare-credentials ~/.secrets/certbot/cloudflare.ini: 这指定了存储Cloudflare API凭据的文件路径。这个文件应该包含用于访问Cloudflare API的必要凭据,通常是你的API密钥。--dns-cloudflare-propagation-seconds 30: DNS记录更新后,全球的DNS服务器需要时间来“传播”或更新这些信息。这个参数告诉Certbot在继续之前等待30秒,以便DNS更改有足够的时间传播。这有助于避免验证失败。-d *.nkd.red: 这指定了要为其获取证书的域名。在这里,*.nkd.red表示一个通配符证书,它将为nkd.red域下的所有子域名(如www.nkd.red,mail.nkd.red等)提供SSL保护。-d nkd.red:这同样指定了要为其获取证书的域名,这次是根域nkd.red。
综合来看,这条命令的作用是使用Certbot通过Cloudflare的DNS API为nkd.red域及其所有子域名获取一个通配符SSL/TLS证书。它利用DNS记录验证域名所有权,并等待30秒以确保DNS记录的全球传播。这样做的好处是能够为一个域及其所有子域提供SSL/TLS保护,而无需为每个子域单独获取和配置证书。
(generated by ChatGPT 4)
当然如果您的域名并不在cloudflare上面, 而是dnspod以及其它, 请使用手动 DNS 验证:
certbot certonly --manual \
  --preferred-challenges=dns \
  --email [email protected] \
  --server https://acme-v02.api.letsencrypt.org/directory \
  --agree-tos \
  -d nkd.red \
  -d "*.nkd.red"
并遵照命令输出的指示进行之后的步骤
run noVNC with ssl
Warn: If you use snap install noVNC, due to standard Snap confinement restrictions you need to have them in the /home/<user>/snap/novnc/current/ directory.
An example command would be on port 8443:
./utils/novnc_proxy \
  --vnc localhost:5901 \
  --listen 0.0.0.0:8443 \
  --cert /etc/letsencrypt/live/nkd.red/fullchain.pem \
  --key /etc/letsencrypt/live/nkd.red/privkey.pem
然后访问: https://lab.nkd.red:8443/vnc.html?host=lab.nkd.red&port=8443 即可.

run noVNC with ssl/tls/https